
 Cindy Fisher
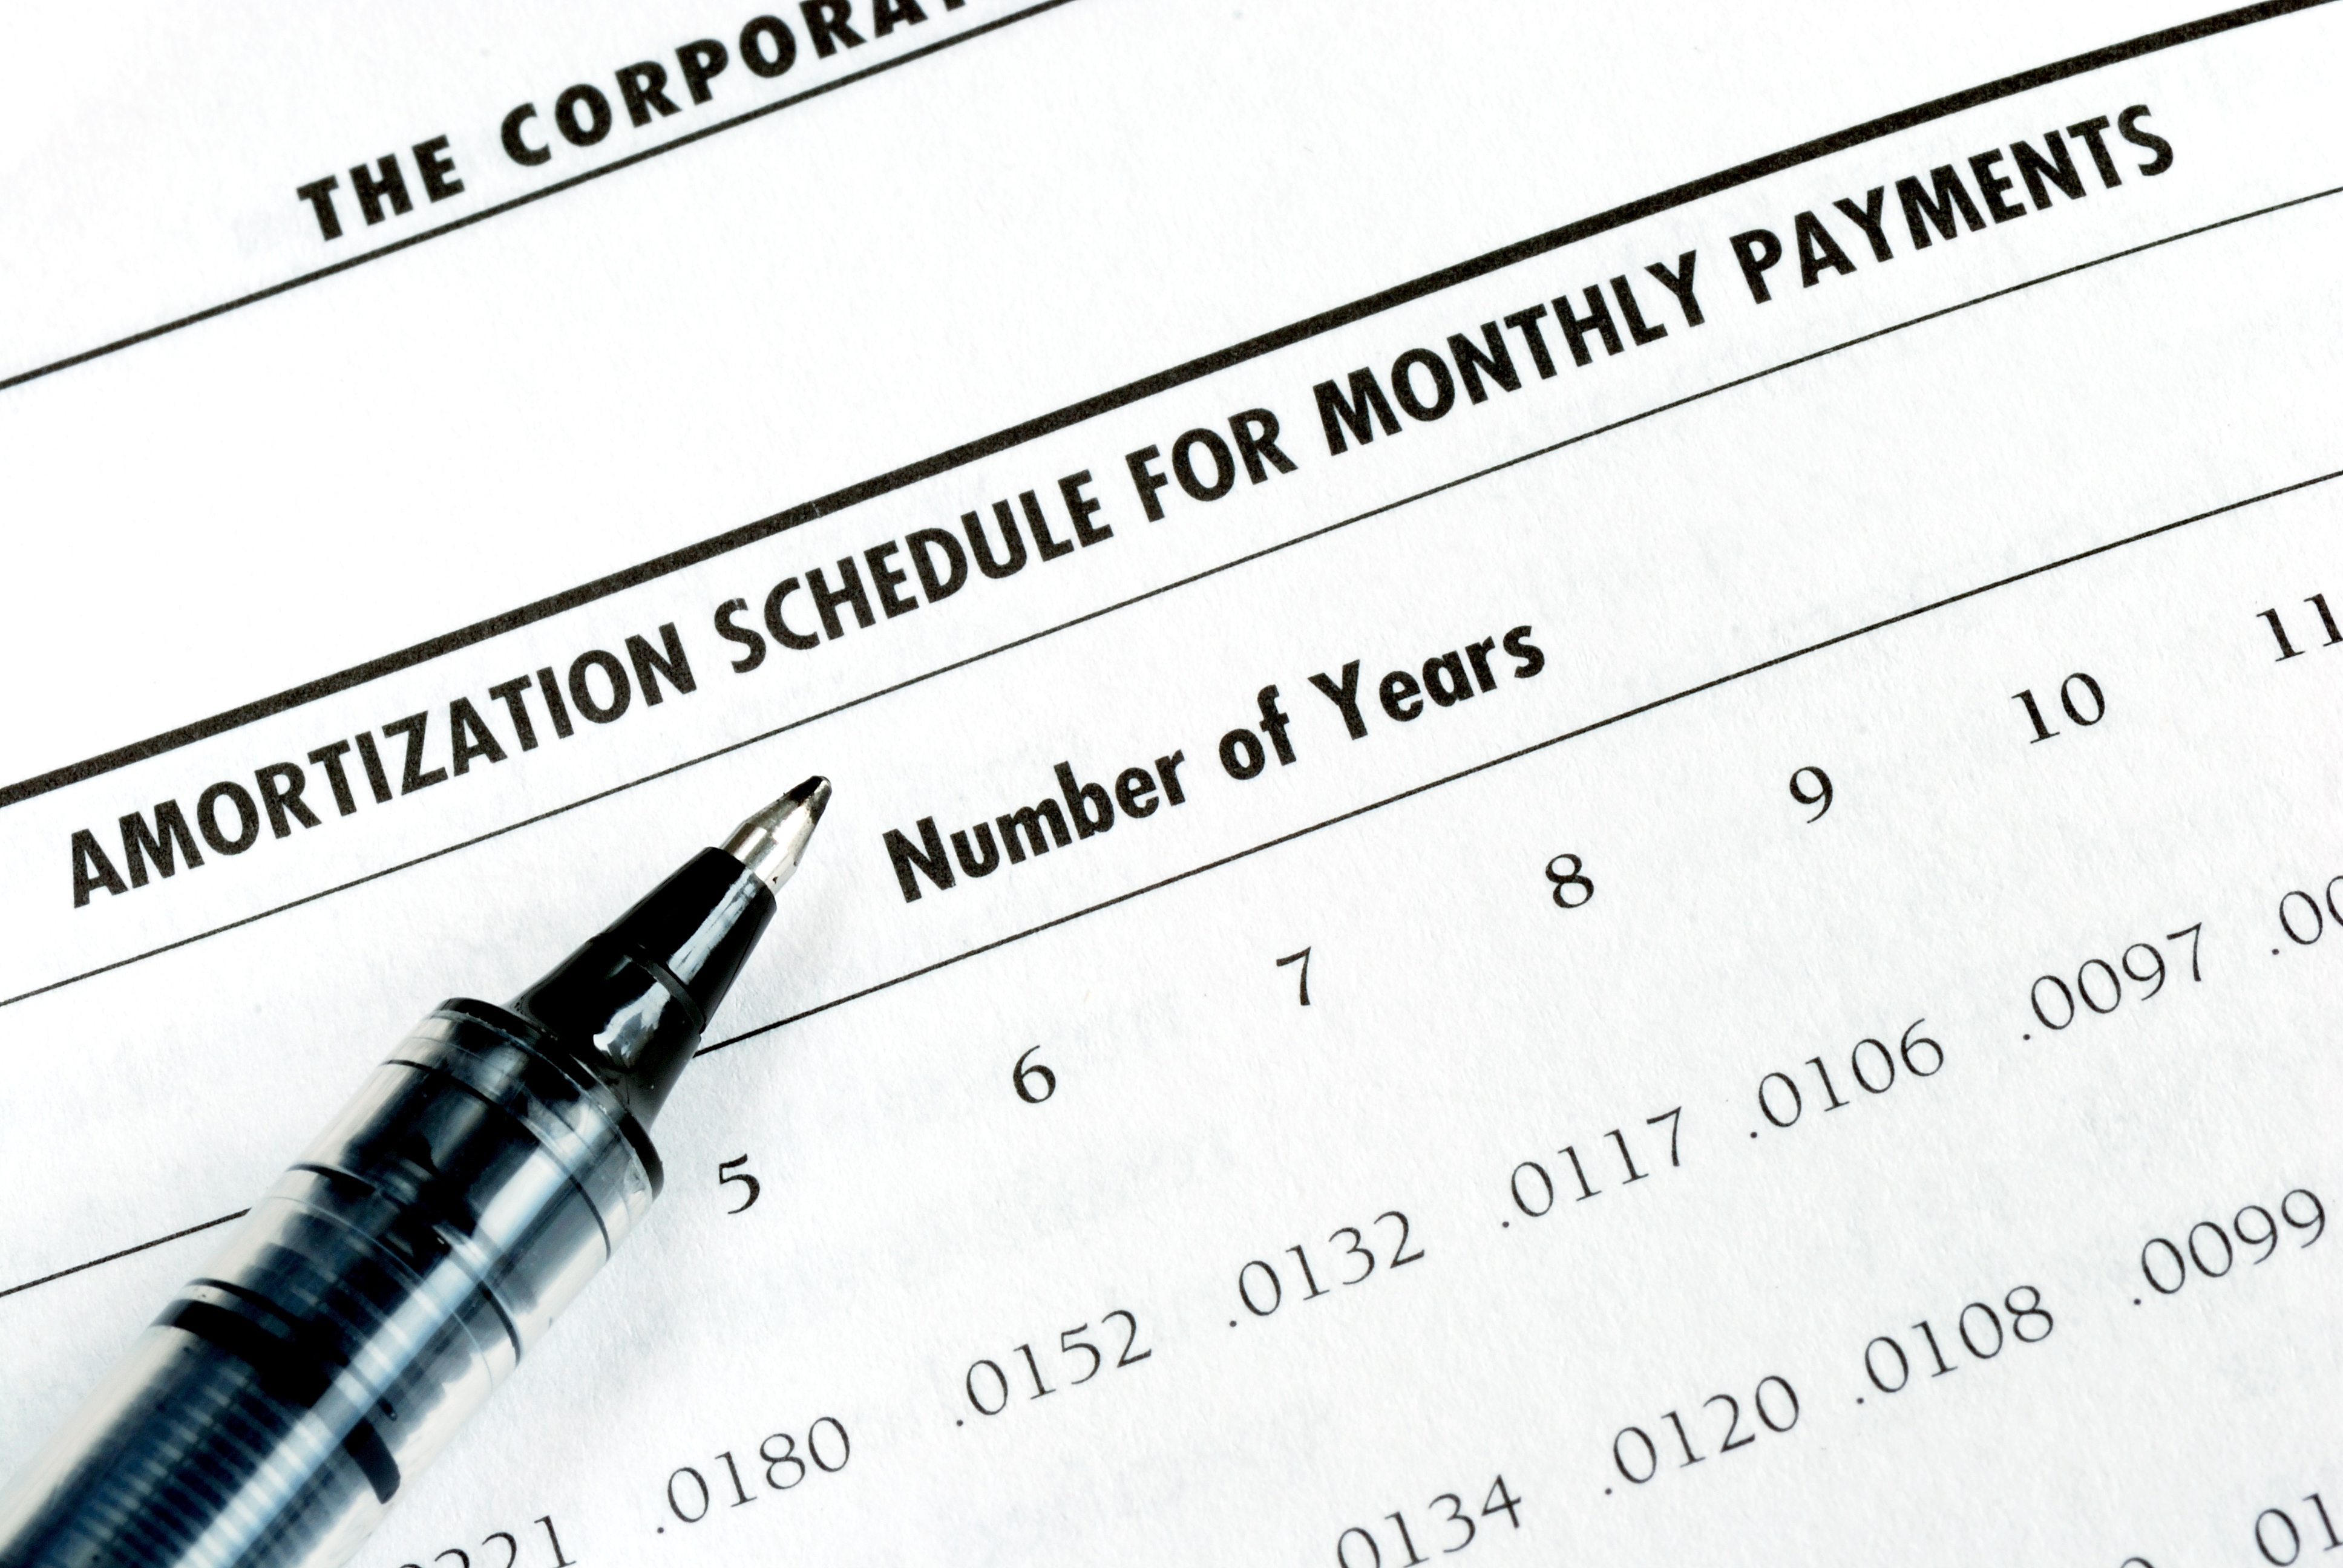
Amortization Deep Dive: The Rule of 78s
As we talked about previously, there are many reasons why understanding amortization methods is helpful for financial professionals. Today, we’re...
Collectors and employees at your institution use Collection Queues to contact borrowers concerning specific activity (or non-activity) on accounts. For example, you may have a queue (list) set up showing all accounts that are 30-days late making their payments; another queue that shows accounts that were designated as bankrupt last month; and another queue where delinquent loans were made current.
All this can be accomplished using GOLDPoint Systems’ Collection Queue system. First time users of GOLDPoint may be intimidated by the Collection Queue process. Creating queues is usually done with the help of GOLDPoint Systems when you first convert on to our system. Our conversion team does a great job of understanding what Collection Queues you already use and can even suggest ones you do not use but probably should.
But after the conversion team is gone and you are now in charge of setting up Collection Queues, it can seem daunting. Of course, our capable and friendly account managers are there to help you every step of the way if you get stuck.
Even so, it is always best to learn for yourself how to use the system. It’s robust on purpose, but you can do this!
Because no two institutions set up queues the same way, this topic aims to show you five common ways to set up queues for accounts that are 30-days late in making their payments. These setups may inspire you to adjust your queues or create new queues.
All collection queues are built on the Queue Administration screen, which is found under Queues Collection in the CIM GOLD tree navigation.
You define queues on the Definitions tab by clicking New, then assigning your queue a name, description, and detail screen, as shown below.
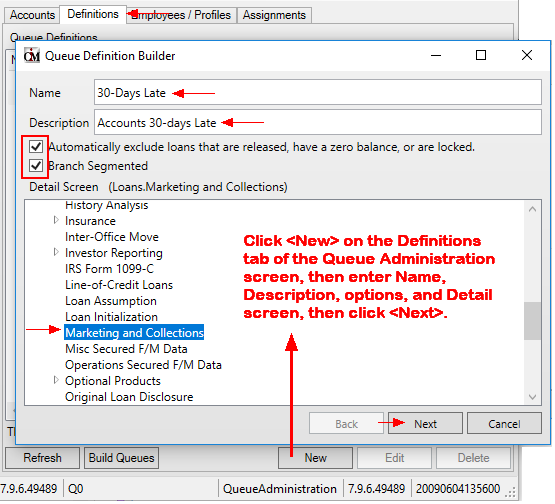
This step is described in more detail in the Queue Definition Builder topic in DocsOnWeb.
For this topic, we want to focus on the next step, which requires defining your queues with fields and records similar to how a GOLDWriter or GOLDMiner report is created. This is explained below.
For this topic, we are going to show how you could set up a 30-day late queue five different ways.

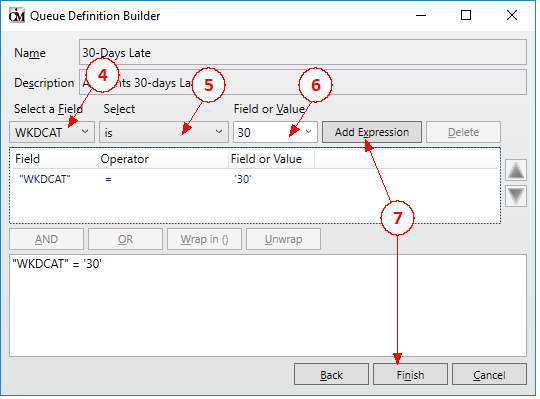
This will pull all accounts that are 30-days late at the start of the month. Accounts will stay in this queue all month unless a payment is made. Even if the account crosses over to being 60-days late by the middle of the month, this account will not move to the 60-day late queue until the first of the following month.
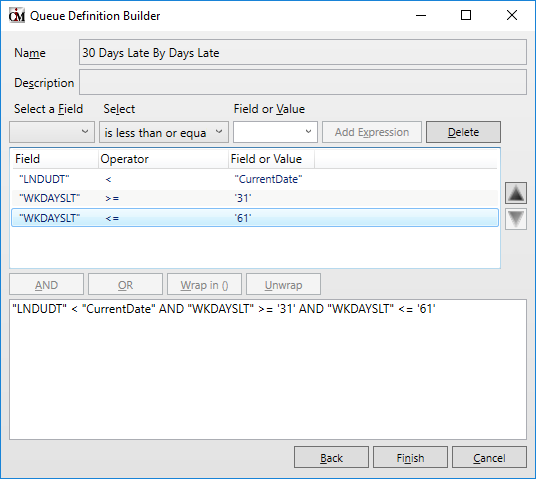
This queue will pull all accounts that are 31-60 days late as of today. The benefits of this queue is that an account could move up to a 60-day queue mid-month if the account is no longer 30-days late but more than 60-days late. Accounts move in and out of this queue even if no payment was made during the month. Accounts qualify as being 30-days late based on actual days late, not including Grace Days.
Phwew! That’s a lot of steps! But now you get the idea of how to set up these definitions. From here on out, we will show you a screen shot of other methods you could use to give you an idea of how to create these queues in other ways.
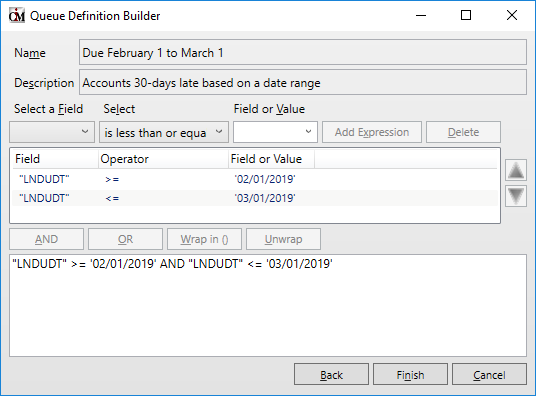
This queue will always pull all accounts due in this date range. This queue requires some monthly intervention to adjust date ranges as desired, but some clients do like using this method to create collection queues.
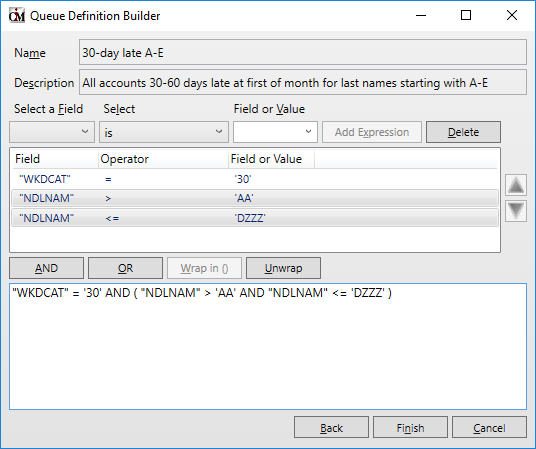
Several clients use last name alphabet ranges to keep a certain group of loans (based on last names matching an alphabet range) with a certain collector in a given branch. This works for the intended purpose but means that without manual assignment changes, the borrower will only ever get called by one collector during that delinquency cycle.
There are pros and cons to this. It also means that the institution will have a lot more queues to manage when they want to make a change, as every queue will be multiplied by the number of alphabet breaks they choose to have (e.g., last names starting with A-D, E-G, H-K, etc.).
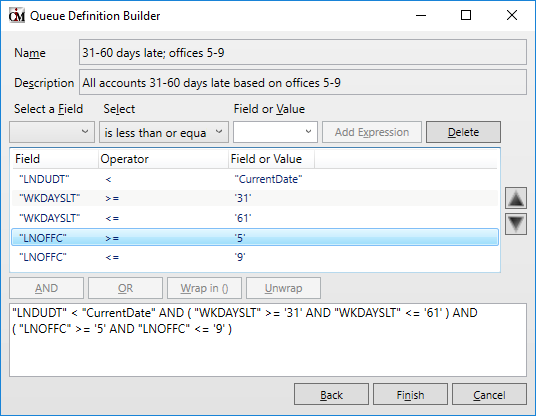
Institutions typically use a branch range when setting up a queue for centralized collections when they want one employee or a group of employees to work on the accounts for certain branches.
This is just the tip of the iceberg. We could probably show a dozen more ways to set up queues based on accounts that are 30-days late.
For a deeper dive on the steps involved in creating collection queues, see the Queue Administration Screen help in DocsOnWeb.
As we talked about previously, there are many reasons why understanding amortization methods is helpful for financial professionals. Today, we’re...

In today's digital age, where online banking and electronic communication have become the norm, ensuring the security of financial information is...

If you spend any amount of time looking over GOLDPoint Systems documentation, you’ve probably come across the term GILA Loan once or twice. But what...

Mail Merge letters are an important part of collection efforts. If an employee can't reach a borrower through calling or texting efforts, they can...

Unfortunately, not every borrower at your institution will keep up with their payments. Some of them may even fall behind enough to land themselves...

Between recency and contractual delinquency, neither is necessarily better or worse for recordkeeping. The method you choose to measure delinquent...